Overview
You will use the flow editor to create flows in Groundhogg.
Creating a flow
There are a few ways you can begin creating a new flow. You can start a new flow…
- From scratch,
- From a template,
- Duplicating and existing flow.
- or by Importing a flow from a file.
From scratch
To start a flow from scratch means to start with a blank canvas and no pre-existing steps.
Go to Groundhogg » Flows » Add New » Start From Scratch to start a new flow with no steps.
From a Template
If you need inspiration, you can start a flow from one of our pre-built and pre-written flow templates!
Go to Groundhogg » Flows » Add New and click Use Template on the template you wish to import.
Duplicating an Existing Flow
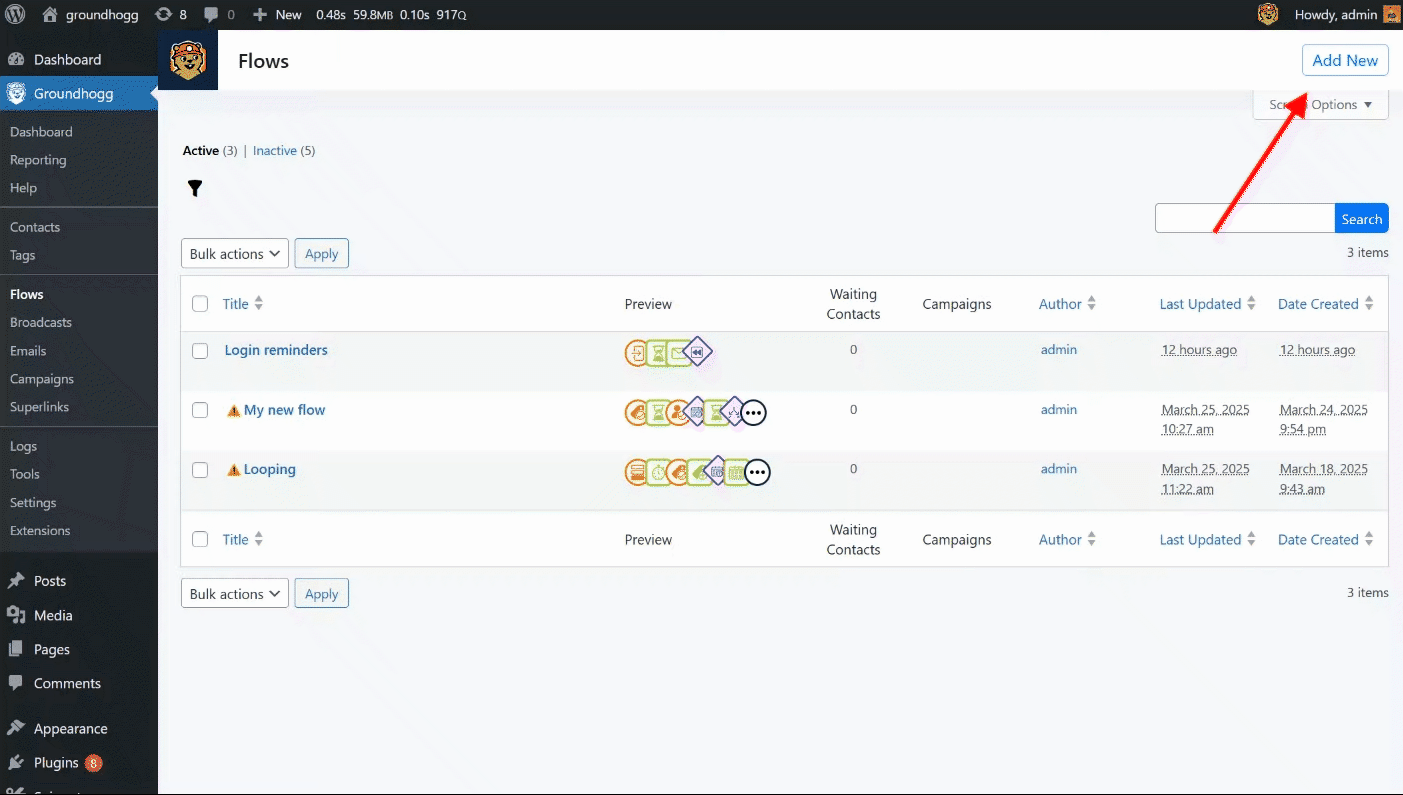
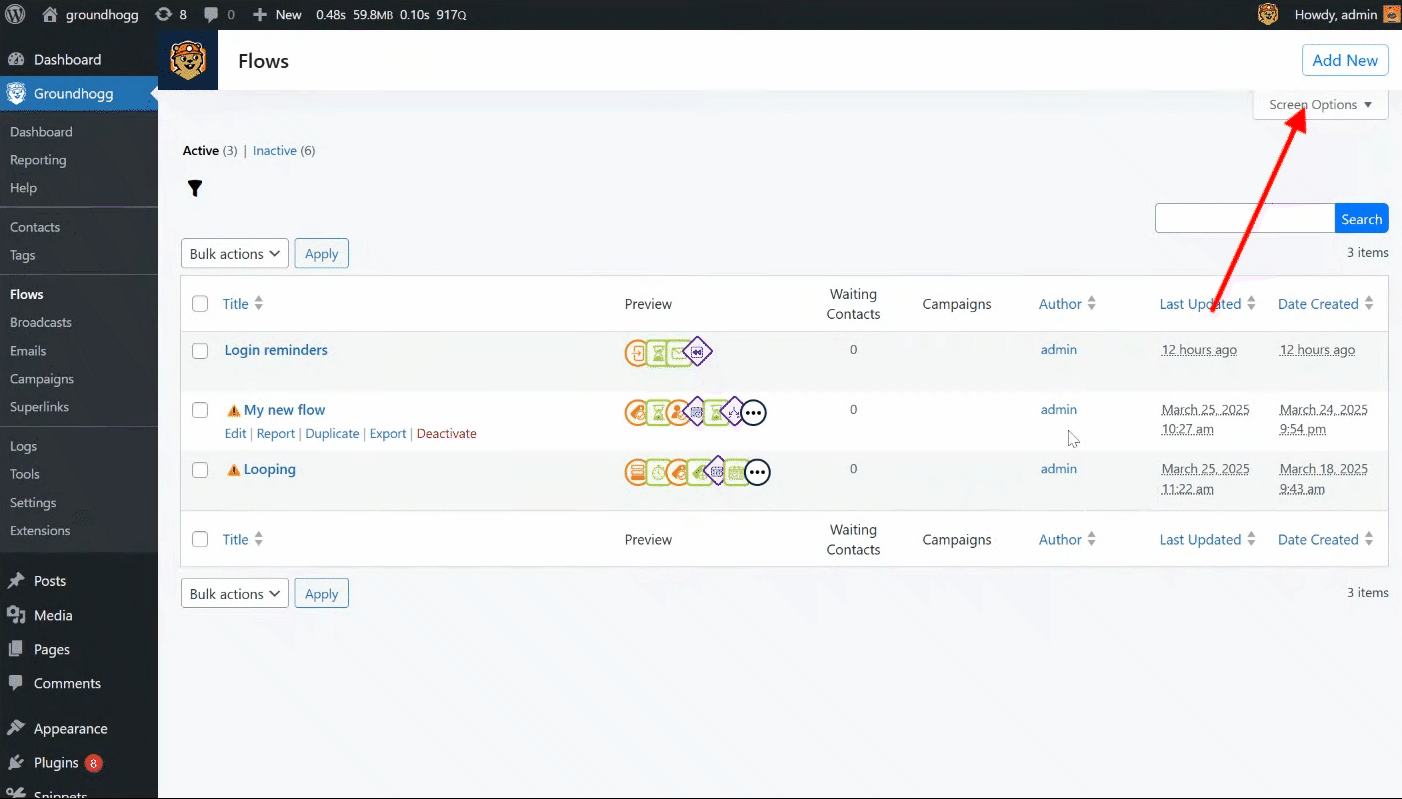
If you want to make a copy of an existing flow, go to the flows table (Groundhogg » Flows) and hover of the flow you want to duplicate. You’ll see the “duplicate” link appear, click it to instantly duplicate your flow.
When duplicating a flow, all the email and SMS assets in the flow will also be duplicated, so editing them will not affect the original flow.
Importing a flow
If you have a flow template file, perhaps exported from another Groundhogg installation, you can import it!
Go to Groundhogg » Flows » Add New » Import and upload the file.
The Editor
After you create your flow you’ll be dropped into the flow editor! This is where the magic happens.
You’ll immediately be prompted to name your flow, you can choose to give it a name or dismiss the prompt. You can always change the name later by clicking on the flow title in the header.
The Header
Above the step flow is the header which contains some of your important editing functions like changing the flow title, undo & redo, simulator, Deactivate link, and the Publish Changes buttons.
You can click on the three dots icon at the end of the header to bring up additional features like:
- Settings – Assign the flow to a campaign or include a detailed description for reference.
- Export – Export the flow for use on another site or to create a backup.
- Share – Generate a shareable link to export the flow
- Reports – Links to the flow’s report
- Add Contacts – Launch the flow wizard to add contacts to the flow.
- Screenshot Mode – Display a streamlined, clean view of the flow for capturing screenshots.
- Fullscreen – Expand the flow interface to full screen for an enhanced viewing experience.
- Keyboard Shortcuts – List of available keyboard shortcuts.
- Feedback – Access the feedback form to share suggestions or report issues.
- Revert Changes – Restore the flow to its most recent saved version.
The Step Flow
Underneath the header is the step flow. This is your canvas for putting together your flow with triggers, actions, and logic.
Adding Steps
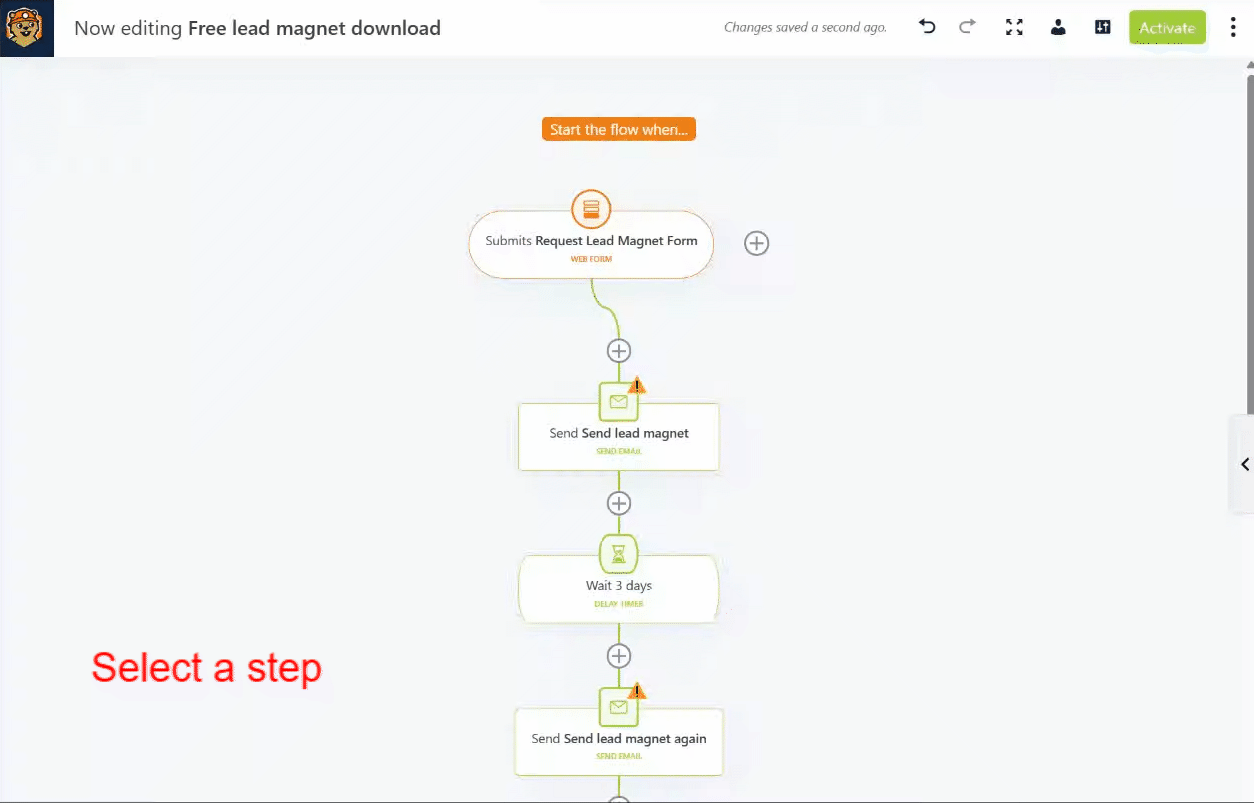
To add steps to the flow, click on any (+) icon in the flow. You’ll notice the (+) icon you clicked will become highlighted (+h).
The step type selector panel will appear from the right. Click on any step icon to add the step to the highlighted (+h) position in the flow.
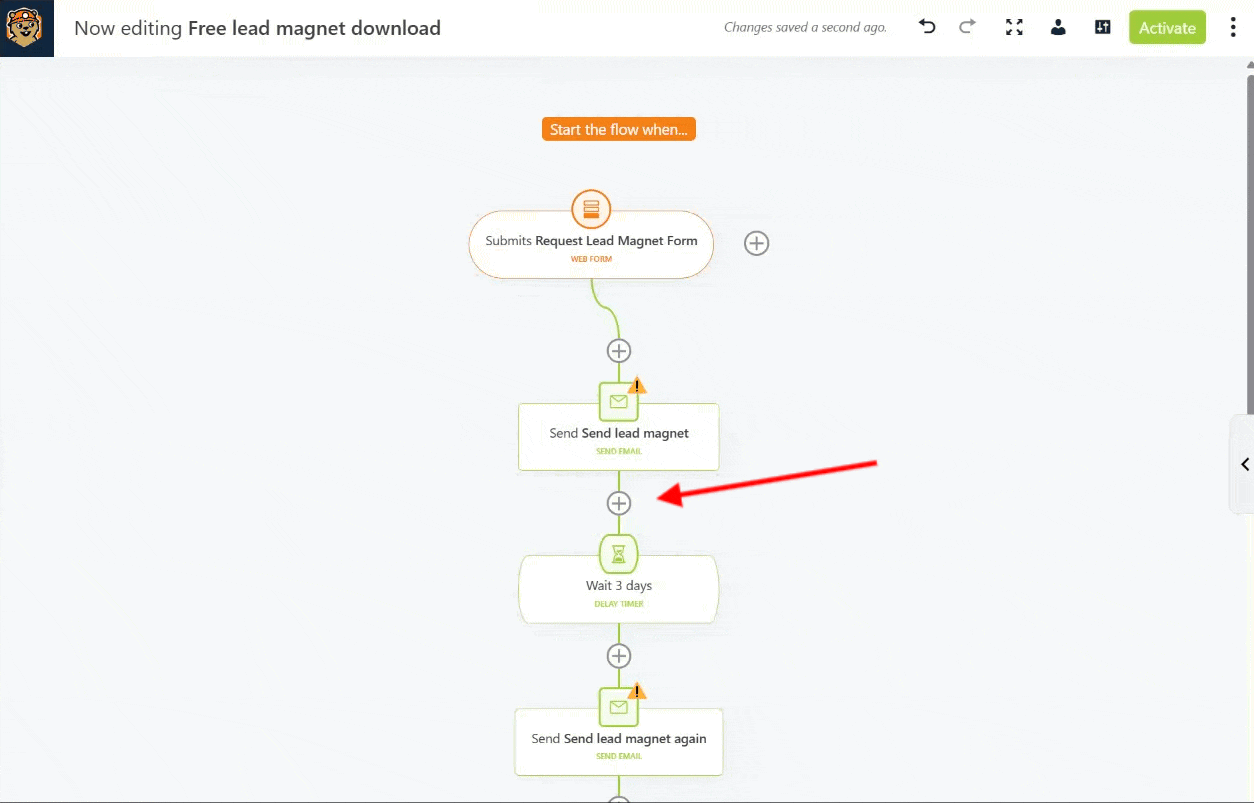
You can also drag the icon into the flow, but clicking is faster!
Editing Steps
Click on a step in the flow to reveal its settings. Any changes you make to the settings will be auto-saved. You will be able to see if your changes were saved by seeing, “Changes saved x seconds ago,” in the header.
Moving Steps
You can move steps within the flow by first selecting a step by clicking it and then using the keyboard shortcut CTRL + M. This will enable “move mode” and you’ll notice all the (+) icons in the flow are now highlighted.
Click on any (+) icon to move the selected step to that position in the funnel.
When moving steps with branches, such as logic or triggers, any steps in those branches will also be moved.
You can also drag and drop steps within the flow if you prefer to avoid using keyboard shortcuts.
If you move a step by mistake, you can easily move it back or use the undo ↺ button in the header.
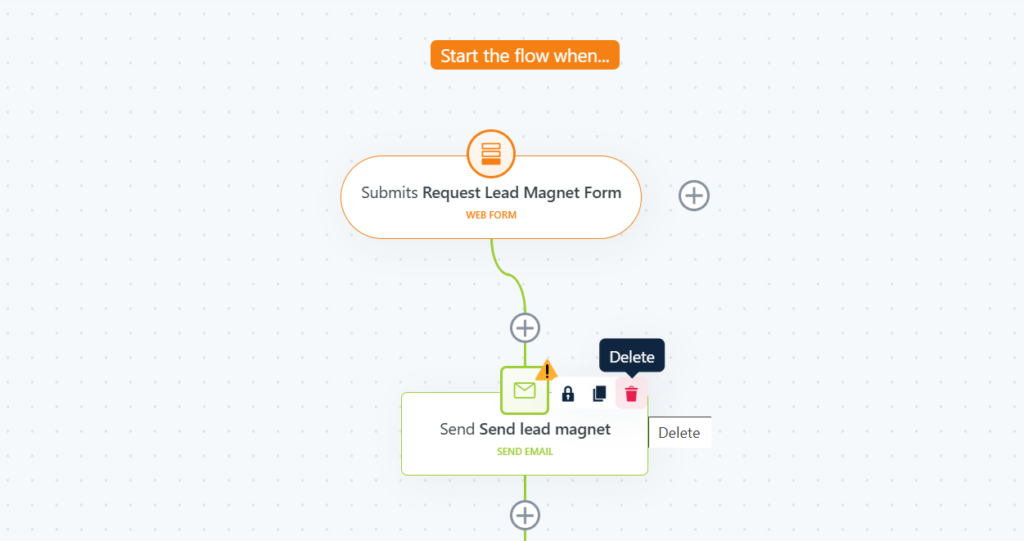
Deleting Steps
To delete a step, hover of the step in the flow to reveal the delete 🗑️icon. Click it to delete the step. When deleting a step that has branches with steps in them, those steps will also be deleted.
If you delete a step by mistake, you can use the undo ↺ button in the header.
The Flow Status
Flows can be either active, inactive, or archived. When creating a new flow the status always starts as inactive.
Contacts can only enter and progress in active flows. If a flow is inactive or archived, contacts will not enter the flow or progress through the flow, even if the flow was previously active.
You can tell if a flow is active, inactive, or archived from the flows table, and also by which button you see in the flow editor header.
- If you see the Activate button, your flow is inactive.
- If you see the Publish Changes button, your flow is active.
- Archived flows can’t be edited.
Activating Flows
To activate a flow…
- Click the Activate button in the flow editor header
- Click the Activate link in the flows table
- Use the Activate bulk action in the flows table
Editing Active Flows
When making changes to active flows, your changes are automatically saved to a draft version of the flow and will only become “live,” when you click Publish Changes. This way any contacts actively moving through the flow are not impacted by the changes as you make them.
You do not have to finish your changes in a single editing session, you can leave and come back at any time. All your changes will be saved to the draft.
⚠️ Publishing Changes will reset the editor history, meaning undo & redo will start from the last published state.
Also, undo & redo history is not preserved between sessions.
You can identify changes made in the flow by the background of the step in the step flow.
- Solid color background – an active step with no changes pending
- Striped color background – an active step with pending changes
- White background – a new step that has been added to the flow, pending activation
When you publish your changes, all steps will become active, adopting whatever changes were made from the draft flow.
Adding new steps to a flow
When adding new steps to an active flow, only contacts that are at a position before the new steps in the flow will progress through those new steps.
If a contact is already at a position past where the new steps were added, they will not go through them.
Adding new steps to the end of a flow
If you are adding new steps to the end of a flow, any contacts that have already finished the flow will not continue through the new steps. If you wish for any previous contacts to also go through the new steps you will have to re-add them manually.
Any contacts that have not yet finished (so are still progressing through the flow) will go through the new steps you’ve added.
The only exception is if you add a trigger as part of the new steps. Any contacts that match a new trigger condition, given that the trigger is at a lower position than where they finished, can progress through that trigger and continue in the flow.
Making changes to timer actions
If you edit any kind of timer action the changes will only affect new contacts that reach it. Any previous or pending events will not be impacted. If you wish for any pending events for timers to be updated…
- Go to the flow report and click on the pending events count for the timer to select the contact segment
- Re-add those contacts to the flow at the desired timer.
Deleting active steps
Deleting a step in an active flow will not take effect until the changes are published.
⚠️ When an active step is deleted (and the flow changes are published) any pending events for that step will be cancelled and deleted, as will any previous event history and activity. The contacts will not be moved to another step in the flow, they will simply be removed from the flow.
If you wish for the contacts to continue in the flow at another step, you should manually move them to a new step in the flow before deleting the step.
Deactivating Flows
To deactivate a flow…
- Click the Deactivate button in the flow editor header
- Click the Deactivate link in the flows table
- Use the Deactivate bulk action in the flows table
If you deactivate an active flow, any pending events in the flow will be paused.
Reactivating the flow will resume paused events.
If you don’t want events to be resumed, go to Groundhogg » Logs » Events » Paused and cancel them before reactivating the flow.
Archiving Flows
If you archive a flow, any pending or paused events will be instantly cancelled. Restoring and reactivating a flow will not impact cancelled events.
Adding contacts to flows
Before you can add contacts to a flow you must activate it!
If your flow has an entry trigger, any contacts that meet the trigger conditions from the time of activation (triggers are not retroactive) will be added automatically. See how flows work.
If you want to manually add contacts…
- In the flow editor header, click the three dots [⁝]
- Select Add contacts to flow
- Follow the wizard prompts
- Pick a contact segment
- Select where to start in the flow.
Was this helpful?
Let us know if this document answered your question. That’s the only way we can improve.